Intel Edison as SmartMesh Gateway
- Thomas Watteyne
Analytics
Intel Edison is a very small and inexpensive single board Linux computer. We detail how we've used it as a WiFi-enabled Gateway for a SmartMesh IP network.
.
Prepare the Intel Edison
We used the Intel Edison Breakout Board Kit. It is available from numerous vendors. You can go through the initial setup of the Edison board by watching the support video at:
The steps you need to go through are:
- Install some software on your computer so you can communicate with Edison.
- Connect Edison to the breakout board and power it up. The easiest is to use a plug-in power supply with the micro USB connector on the Edison Breakout Board, but you can also connect a 9V battery to
J21right next to the USB power connection. - Download an image and flash your Edison board.
- Configure your WiFi on the Edison board and get it connected to your WiFi network. In order to get it to connect, you likely will have to install an antenna to the u.fl connector on the Edison board.
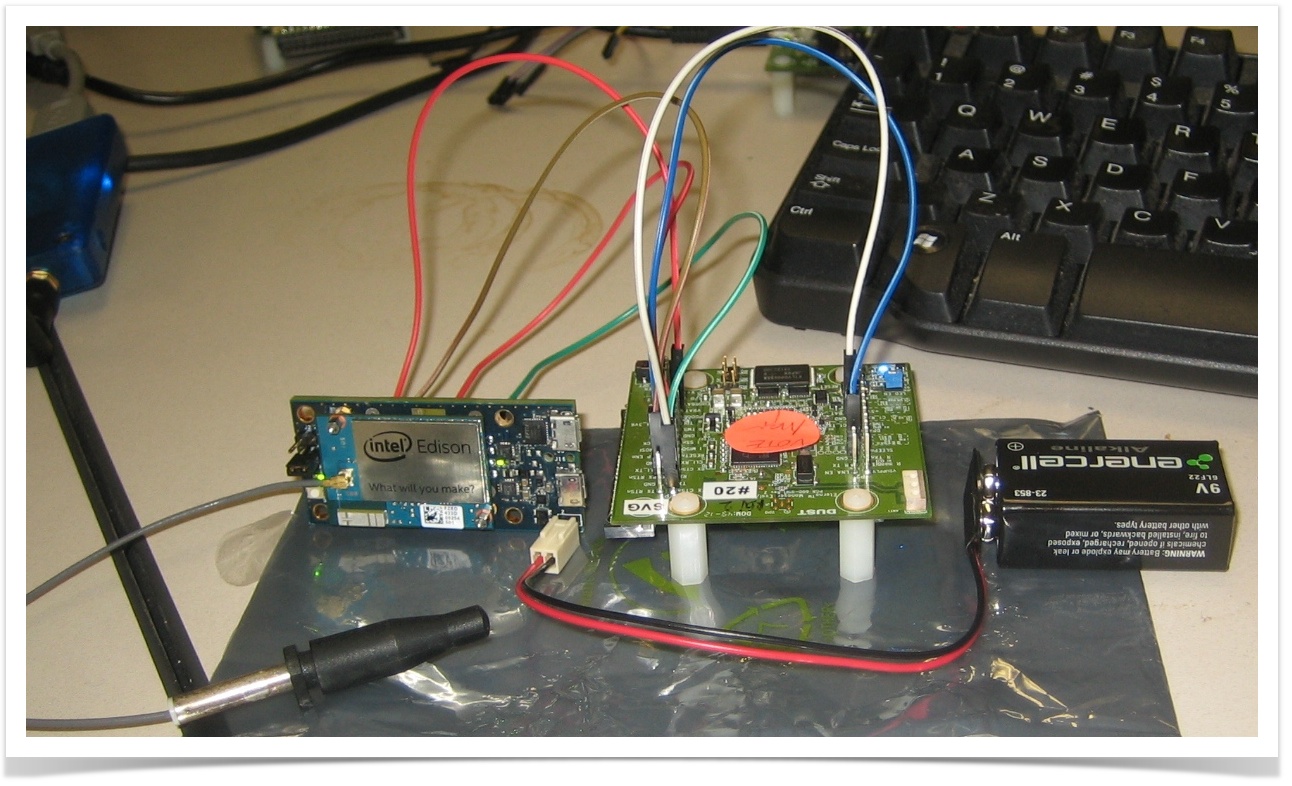
Hardware Connections to the IP Manager
On the back of the Breakout Board there are four rows of 14 pins each, labelled J17, J18, J19 and J20. We need to connect to four of those pins. It might be better to just solder 4 1x14 pin headers to the board so you can do other expansion projects later. We want to connect power, ground and two UART pins from the Breakout Board to the manager.
- Power: There is a 3.3V output on
J20, pin 2 of the Edison Breakout Board. Connect this toVBATon the DC9003. - Ground:
GNDis onJ19, pin 3. This should be connected toGNDon the DC9003. UART1 TXfrom Edison to the manager:J19, pin 8 should be connected toRXon the DC9003.UART1 RXinto Edison from the manager:J18, pin 13 should be connected toTXon the DC9003.
In addition to these four connections, we will connect two flow control pins on the manager to ground. By tying these two flow control pins on the manager, we simplify the UART operation at the expense of a little bit of power consumption. These are:
RX RTSn: Connect this to any convenientGNDpin on the DC9003. This is an input to the manager telling it to always be ready to receive.TX CTSn: Connect this to any convenientGNDpin on the DC9003. This is an input to the manager telling it that it always can transmit.
When these connections are all made, turn on the power switch on the manager. The Blue LED lights up, indicating the manager is booted up and receiving power from the Edison.
Configure Python on the Edison
Most of what you need to run DustLink is already pre-installed, but we need to add a few small packages. Log into your Edison as root. At the prompt, type:
root@edison:~# wget --no-check-certificate https://bootstrap.pypa.io/get-pip.py
This command goes to that URL and downloads a python script called get-pip.py. This won't work if you haven't connected your Edison board to the internet via WiFi. When that is complete, run the script with:
root@edison:~# python get-pip.py
That command will download the pip distribution itself. When that is complete, install it with the command:
root@edison:~# easy_install pip
Install DustLink
Download the DustLink zip file. I used release 1.0.2.63. Use a file transfer tool like WinSCP to connect to the IP address of Edison to move the zip file from your computer to your Edison. Once it is there, unzip the file with the command:
root@edison:~# unzip DustLink-1.0.2.63.zip
The final installation step is performed with the following commands:
root@edison:~# cd DustLink-1.0.2.63/
root@edison:~/DustLink-1.0.2.63# pip install -r requirements.txt
Now you are done installing DustLink on your Edison. Anytime you want to run DustLink, navigate to the dustLinkfullWeb/ directory and run the script.
root@edison:~# cd DustLink-1.0.2.63/bin/dustLinkFullWeb/
root@edison:~/DustLink-1.0.2.63/bin/dustLinkFullWeb# python dustLinkFullWeb.py
Now DustLink is running on your Edison. Just point any browser that is on the same WiFi LAN at http://<the IP address of your Edison>:8080. For my system, I typed:
10.70.48.70:8080
into the URL window of my browser and the DustLink website is displayed. Login as admin/admin and go to the Managers page. There you need to Add a new manager connection for the device called:
/dev/ttyMFD1
This is the device name of the UART we connected in the section above. Enter that name and click Submit. You should see that connection appear on the list at the top of the page and the state of that connection. When it goes to active you know your Edison is connected to your manager. At that point, you should be able to see your motes, the network topology, and sensor data updating on the Dashboard. Congratulations! You have built a prototype WiFi-enabled SmartMesh IP Gateway.
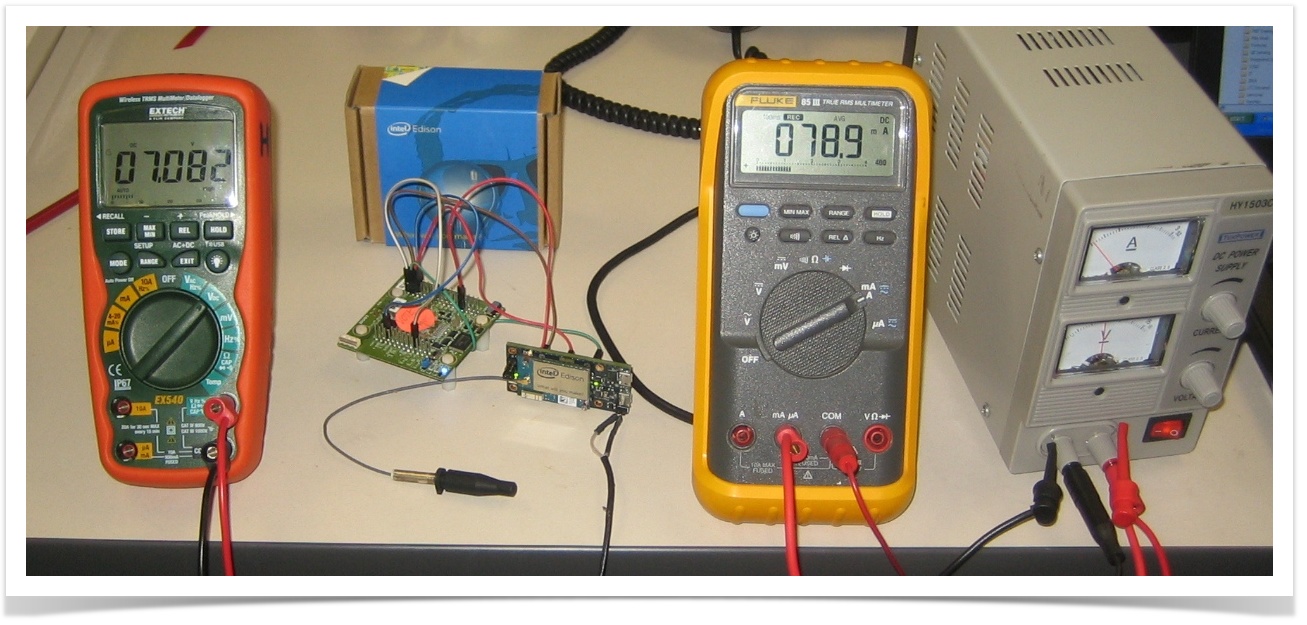
Measuring System Power Consumption
The Edison and the DC9003 manager can be powered from a battery, as shown in the image above. The Edison just needs 7-15V DC. We went through the exercise of measuring the total system power consumption in operation. We used a benchtop power supply to give us ~7V. We used a fairly accurate multimeter in parallel to measure the Voltage and an averaging multimeter in series to measure the current. The total system power consumption at ~7V was <80mA. This is probably too much power for a battery powered application. A generic 250mAhr 9V battery will only run for 3-4 hours.