Raspberry Pi as SmartMesh Gateway
- Thomas Watteyne
The Raspberry Pi is a hugely popular, inexpensive, credit card-sized Linux computer. We detail how we've used it as a Gateway for a SmartMesh IP network.

Prepare the Raspberry Pi
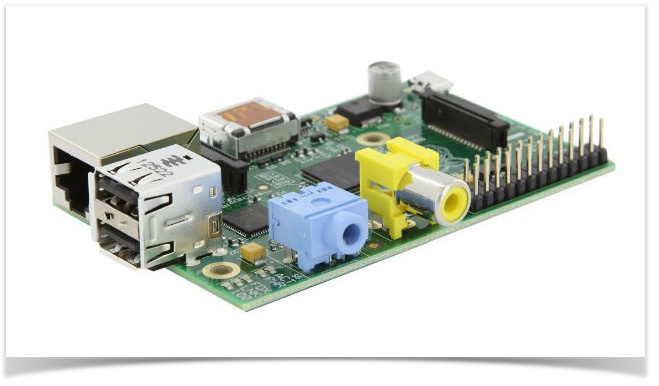
- We use the Raspberry Pi model B
- Install Raspbian (as part of NOOBS, we use NOOBS 1.3.9)
If are connecting your SmartMesh IP Manager through the UART pins:
You do not need to do these steps if you plan on connecting your SmartMesh IP Manager over USB.
By default, the Raspberry Pi uses the UART pin as a command line interface for Linux. After the first boot, you need to configure Linux to not use those pins:In
/etc/inittab, replaceT0:23:respawn:/sbin/getty -L ttyAMA0 115200 vt100
with
#T0:23:respawn:/sbin/getty -L ttyAMA0 115200 vt100
In
/boot/cmdline.txt, replacedwc_otg.lpm_enable=0 console=ttyAMA0,115200 kgdboc=ttyAMA0,115200 console=tty1 root=/dev/mmcblk0p2 rootfstype=ext4 elevator=deadline rootwait
with
dwc_otg.lpm_enable=0 console=tty1 root=/dev/mmcblk0p2 rootfstype=ext4 elevator=deadline rootwait
Reboot the Raspberry Pi so these changes take effect
sudo shutdown -r now
Hardware Connections
You do not need to do these steps if you plan on connecting your SmartMesh IP Manager over USB.
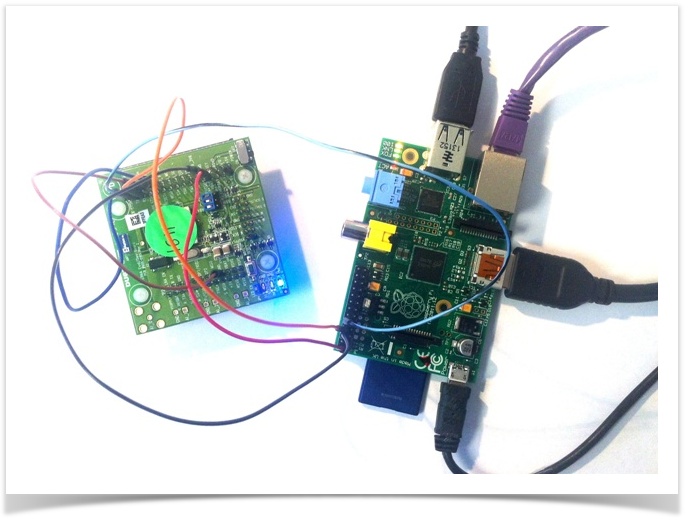
We are connecting the serial API port of the SmartMesh IP manager to the UART on the Raspberry Pi.
Pinout of the Raspberry Pi header:
3.3V | 1 | 2 | 5V |
|---|---|---|---|
I2C0 SDSA | 3 | 4 | DNC |
I2C0 SCL | 5 | 6 | GND |
GPIO4 | 7 | 8 | UART TXD |
DNC | 9 | 10 | UART RXD |
GPIO 17 | 11 | 12 | GPIO 18 |
GPIO 21 | 13 | 14 | DNC |
GPIO 22 | 15 | 16 | GPIO 23 |
DNC | 17 | 18 | GPIO 24 |
SP10 MOSI | 19 | 20 | DNC |
SP10 MISO | 21 | 22 | GPIO 25 |
SP10 SCLK | 23 | 24 | SP10 CE0 N |
DNC | 25 | 26 | SP10 CE1 N |
Connections between the Raspberry Pi and DC9003 SmartMesh IP Manager
| Raspberry Pi pin | DN9903 pin name (silkscreen) |
|---|---|
GND | GND |
3.3V | VBAT |
UART TXD | RX |
UART RXD | TX |
GND | TX CTSn |
GND | RX RTSn
|
Install DustLink
The Raspberry Pi comes with Python 2.7, so you can run any application developed using the SmartMesh SDK. Here, we will run DustLink:
- Download the latest release from https://github.com/dustcloud/dustlink/releases on your computer, as a zip file.
- Transfer it to your Raspbery Pi, for example using SCP.
Enter the following commands to install DustLink (you only need to do this once)
pi@raspberrypi ~ $ unzip dustlink-REL-1.0.2.63.zip
pi@raspberrypi ~ $ cd dustlink-REL-1.0.2.63/
pi@raspberrypi ~/dustlink-REL-1.0.2.63 $ sudo apt-get install python-setuptools
pi@raspberrypi ~/dustlink-REL-1.0.2.63 $ sudo easy_install pip
pi@raspberrypi ~/dustlink-REL-1.0.2.63 $ sudo pip install -r requirements.txt
Start DustLink
pi@raspberrypi ~/dustlink-REL-1.0.2.63 $ cd bin/dustLinkFullWeb/
pi@raspberrypi ~/dustlink-REL-1.0.2.63/bin/dustLinkFullWeb $ sudo python dustLinkFullWeb.py
- In your browser, open
http://<your_raspberry_pi_ip_address>:8080/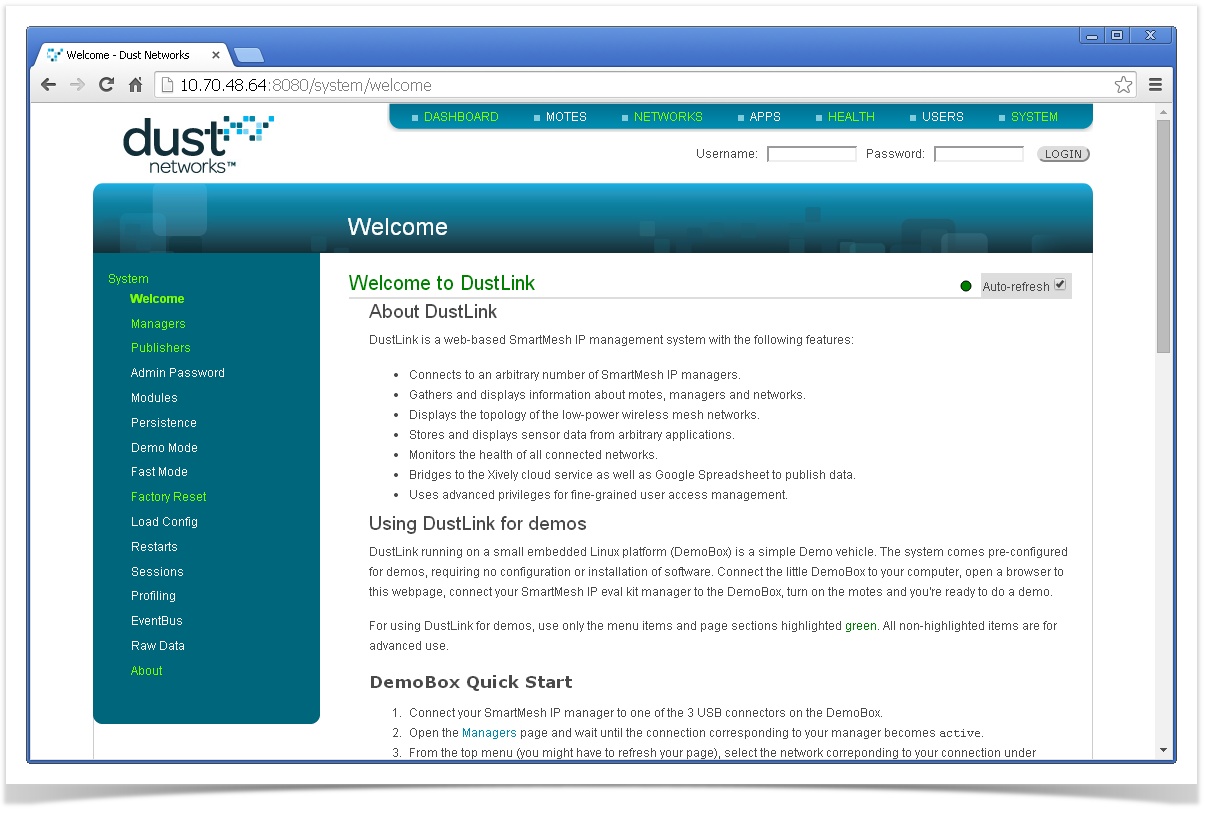
Configure DustLink
- Log into the web interface using:
- username:
admin - password:
admin
- username:
- Navigate to
Managers - Under the
Addsection, enter/dev/ttyAMA0and press Enter. After 10s, this connection is active
Refer to the DustLink documentation for information on using DustLink.
Start DustLink on boot
Install
screen:sudo apt-get install screen
Create file
/home/pi/startDustLink.shwith the following content:#!/bin/bash cd /home/pi/dustlink-REL-1.0.2.63/bin/dustLinkFullWeb python dustLinkFullWeb.py
Change ownership and permission for that file and the DustLink folder:
sudo chown pi:pi /home/pi/startDustLink.sh
sudo chmod 744 /home/pi/startDustLink.sh
sudo chown -R pi:pi /home/pi/dustlink-REL-1.0.2.63/
Have
cronstart DustLink on reboot:crontab -e
then, add the following line:
@reboot screen -dmS DustLink bash -c "/home/pi/startDustLink.sh"
Reboot the Raspberry Pi
sudo shutdown -r now
Note Well
Raspberry Pi is a trademark of the Raspberry Pi Foundation. See http://www.raspberrypi.org/ for details.