| Info | ||
|---|---|---|
| ||
|
| Table of Contents |
|---|
| Tip |
|---|
SmartMesh IP mesh networks and and IBM Watson IoT are perfectly complementary. Sending data gathered by a SmartMesh IP mote into the Watson IoT platform is a breeze, as you will see in this recipe. |
Overview
| Gliffy | ||||||||||||
|---|---|---|---|---|---|---|---|---|---|---|---|---|
|
Create your network
We assume you have a DC9000B SmartMesh IP starter kit
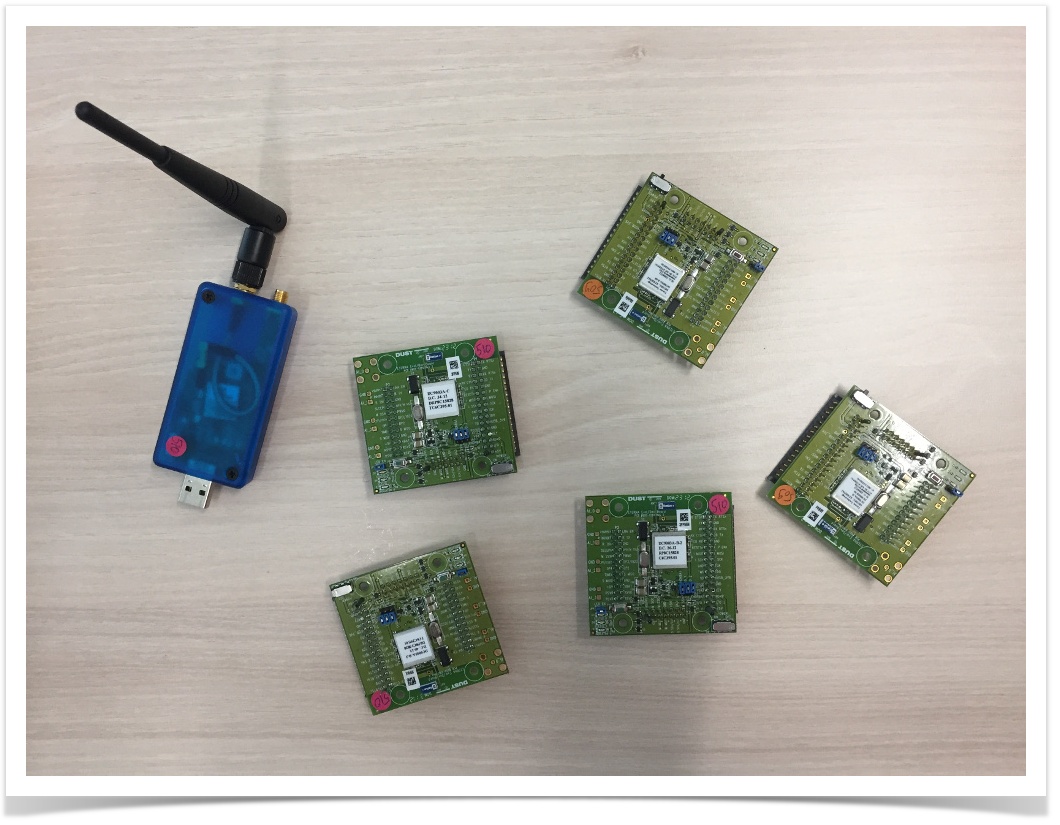
Note There are many many things you can do with this kit, including connecting external sensors, reprogramming the motes, driving the motes from an external micro-controller, etc. In this recipe, we assume you are using an out-of-the-box kit, in which nodes are running the default firmware in master mode.
In this mode, each mote publishes a temperature reading every 30s. This is what we will publish to Watson IoT Quickstart.
Plug the manager into your computer's USB board and its blue LED switches on
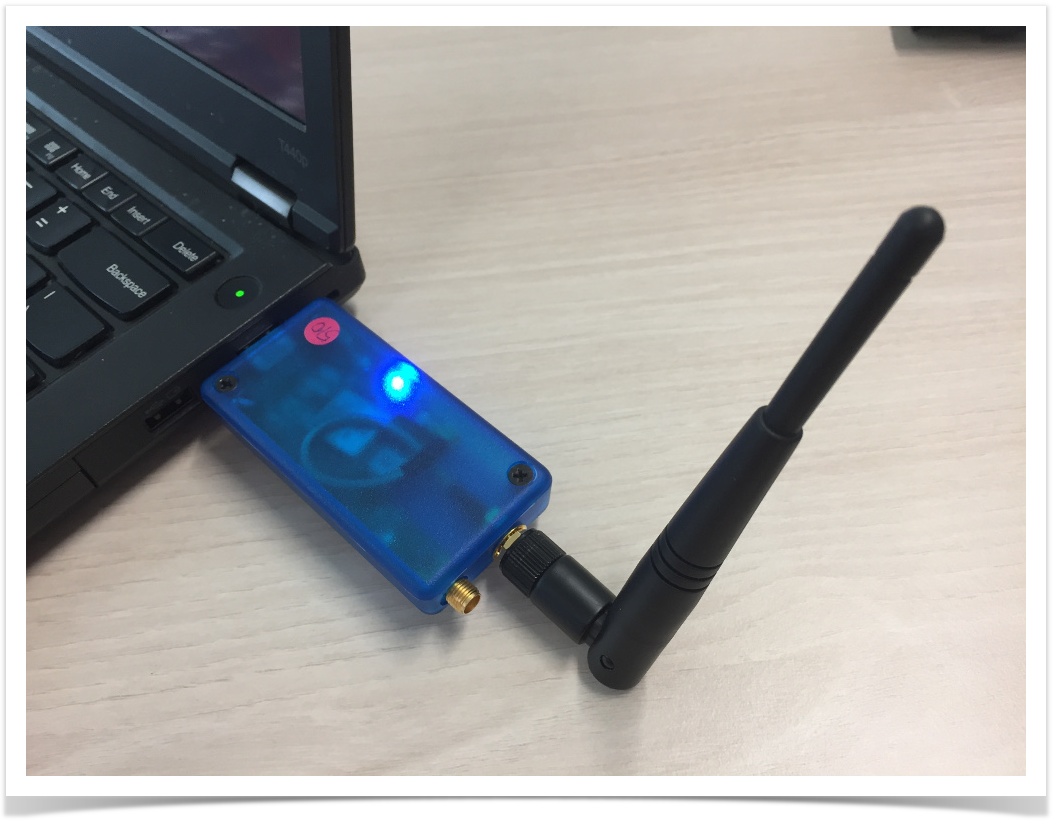
Info When you plug the manager into your computer, 4 serial ports appear on your computer. If you're using Windows, they are listed in your Device Manager.
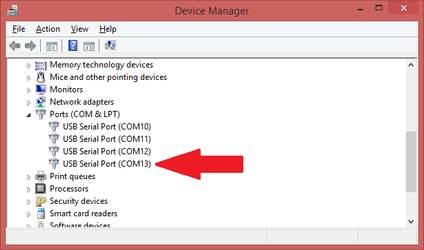
Note the number of the 4th port in the list, in my case "COM13".
Switch on at least one mote, two green LEDs are steady-on when the mote has successfully joined the network and is publishing data:
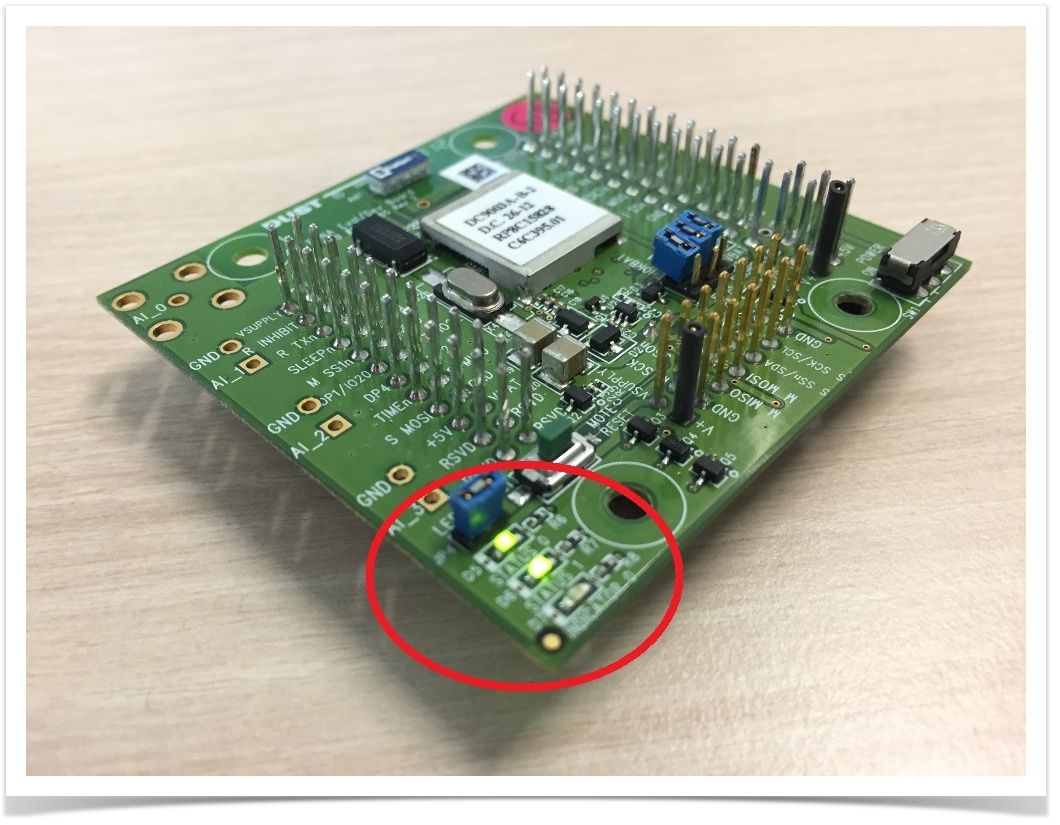
Note The LEDs are only active when the blue "LED EN" jumper is placed, as in the picture above.
| Info | ||||
|---|---|---|---|---|
| ||||
That's it, you have a fully functional SmartMesh IP network with every mote publishing a temperature reading every 30s. |
Run the software
On your computer, you will need to run two programs: JsonServer and Node-RED
JsonServer
JsonServer is a program developed by the DustCloud community and part of the SmartMesh SDK.
It connects to your SmartMesh IP manager and opens an HTTP JSON interface that Node-RED can connect to.
Download the latest release of the SmartMesh SDK at https://github.com/dustcloud/smartmeshsdk/releases
Tip There are several ways of running the SmartMesh SDK, depending on your operating system. On my Windows computer, the quickest way is to download the pre-compiled binaries:

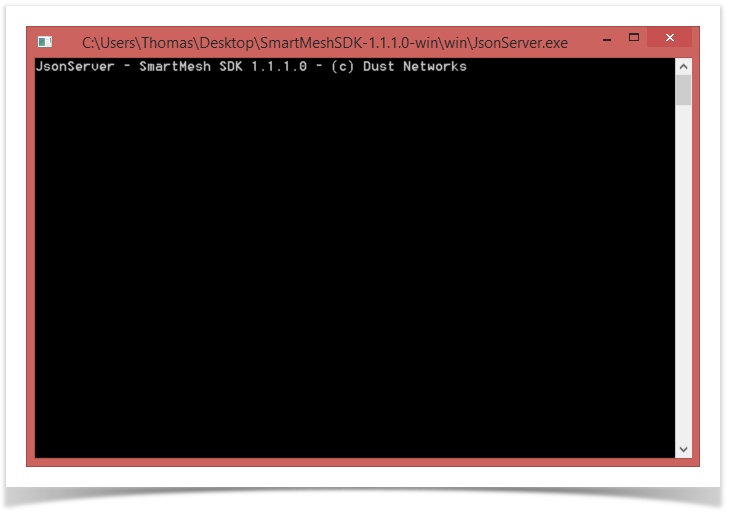
Unzip the folder, and double-click on
SmartMeshSDK-1.1.1.0-win\win\JsonServer.exe.You can of course also download the (Python) source code and run that. This is documented at SMSDK.
- Run the application
Node-RED
| Include Page | ||||
|---|---|---|---|---|
|
| Include Page | ||||
|---|---|---|---|---|
|
Publish to Watson IoT Quickstart
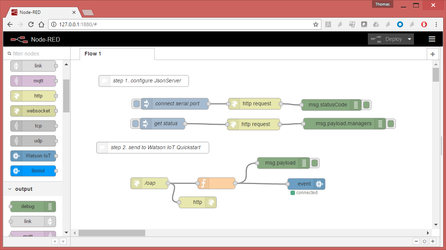
- Copy the following Node-RED flow into Node-RED:
| Info | ||||
|---|---|---|---|---|
| ||||
| Code Block | | |||
|
| Include Page | ||||
|---|---|---|---|---|
|
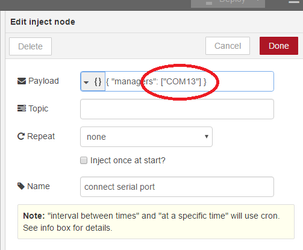
- Double-click on "connect serial port" and change "COM13" by the name of the serial port you noted above
- Click the Deploy button on Node-RED
- Click on the left of the "connect serial port" widget
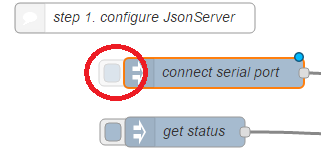
Make sure the debug tab on the right contains "200"
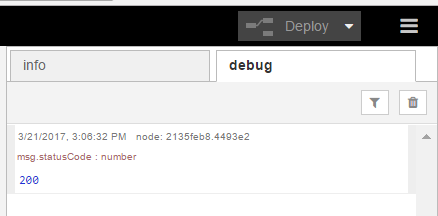
Info icon false title What just happened? You just issued a command to the JsonServer application to connect to your SmartMesh IP manager's serial port.
- Click on the left of the "get status" widget
Make sure the debug tab on the right contains "connected"
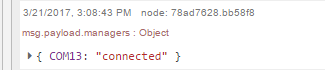
Info icon false title What just happened? You asked the JsonServer what its status is, and it responded that it is connected to your SmartMesh IP Manager.
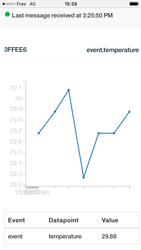
Choose any one of your motes, and read its label, in my case "3FFEE6"
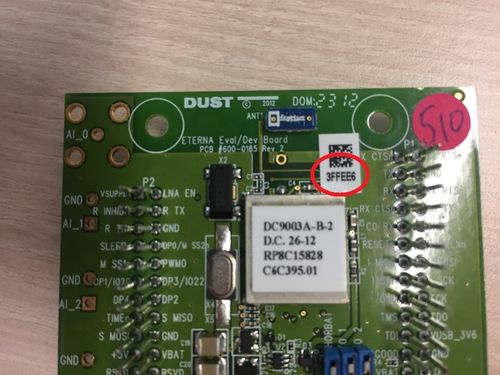
Info title What's that? The label contains the unique identifier of the mote.
- In Node-RED, double-click on the function widget
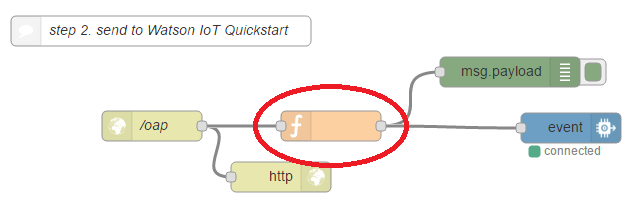
- Replace "3FFEE6" by what you have on your label and click Done
- Double-click on the event widget
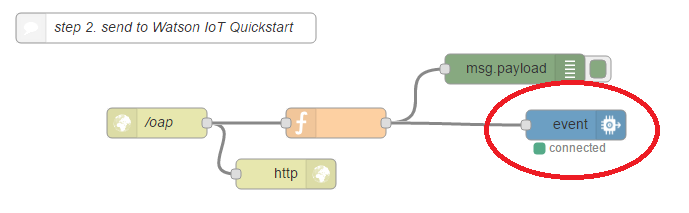
- Change the Quickstart Id by your mote's identifier, and click Done
- Click Deploy
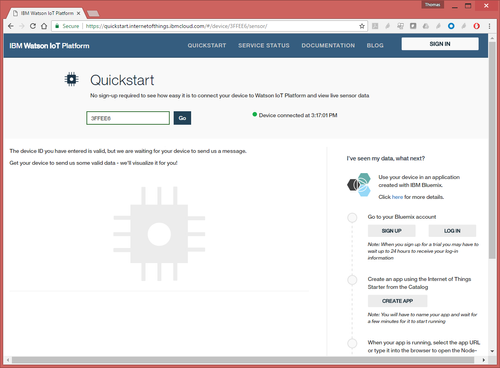
- Go to https://quickstart.internetofthings.ibmcloud.com
- check the box to accept the terms and conditions
- enter the identifier of your mote and press Go

- You start by seeing an empty screen, this is normal as the mote only publishes every 30s
- Every 30s, a new datapoint plots live
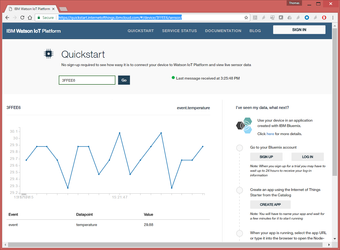
| Tip |
|---|
You can see the same data on different devices, just go to https://quickstart.internetofthings.ibmcloud.com and enter the identifier of your board. |
Where next?
We hope to have convinced you of how easy it is to send data from your SmartMesh IP to IBM Watson IoT. We have obviously only scratched the surface of what's possible.
| Tip | ||
|---|---|---|
| ||
|
| Tip | ||
|---|---|---|
| ||
|