...
| Info | ||
|---|---|---|
| ||
|
| Table of Contents |
|---|
The Setup
In this setup, three Philips HUE lamps are connected (through a Philips HUE bridge) to the instructor's computer. A program runs on that computer which connects to the Watson IoT Platform and subscribes to device commands for the Philip HUE lamps. This allows you to send commands into the Watson IoT Platform to control the lamps.
| Gliffy | ||||||
|---|---|---|---|---|---|---|
|
| Info | ||
|---|---|---|
| ||
The instructor created three devices of device type "lamp'' on the Watson IoT Platform, one for each lamp in the room. What runs on the instructor's computer is an instance of Node-RED and the Philips HUE drivers. These drivers implement the Philips HUE bridge API. The Node-RED instance connects to the Watson IoT Platform, listens for commands for the three "lamp" devices, and forwards the contents of those commands to the Philips HUE drivers. |
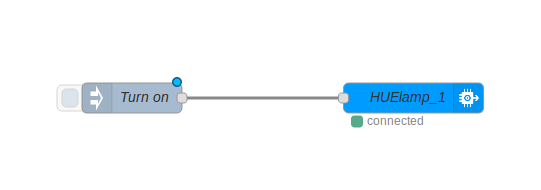
Turn On the Light!
First, create a new flow (tab) on your Node-RED instance. You need to send a JSON command to Bluemix with the following payload:
| Code Block |
|---|
{"on":true} |
The instructor's computer is listening for commands addressed to the following devices ids: HUElamp_1, HUElamp_2, HUElamp_3
Follow the same pattern to turn the light off.
Change the light color
Here is the JSON format to change the light color. Can you make the light turn red?
| Code Block |
|---|
{"sat":254, "bri":254, "hue":20000} |
The hue parameter corresponds to a color value between 0 and 65535.
You can change those values independently.
Refer to the Philips HUE bridge API for the full list of parameters (you have to create an account).
Control the lamp with a sensor
Instead of clicking on Node-RED manually to control the lights, use the sensor input to automate things.
Temperature sensor
Change the color depending on the temperature.
Magnetic Switch (door)
Turn the light on when the door is open.
Accelerometer
Change the brightness of one lamp depending of the angle of your mote.
...
|
If you have finished the rest of the unplugfest early, build something with the building blocks you just learnt about. Here are some ideas:
- Build a dashboard to visualize the motes' data (hint: use the Node-RED node-red-dashboard extension)
- Create a control loop: switch the buzzer on when the door closes
- Implement your own idea!
| Note | ||||||||||||
|---|---|---|---|---|---|---|---|---|---|---|---|---|
| ||||||||||||
|
...