| Info | ||
|---|---|---|
| ||
|
| Table of Contents |
|---|
| Tip | ||
|---|---|---|
| ||
This post recipe focuses on the integration of SmartMesh IP into ThingWorx. If you don't know what ThingWorx is, we recommend the excellent guides from the ThingWorx developer portal. |
The goal of this blogpost recipe is to get you started integrating your SmartMesh IP network into ThingWorx. After following these steps, you will be able to explore all the possibilities ThingWorx offers, including analytics.
Overview
The setup you will build contains the following:
- a DC9000 SmartMesh IP starter kit, with all 5 motes publishing temperature data to the SmartMesh IP manager every 30 s
- the SmartMesh IP manager connected to a computer over USB
- the
JsonServerapplication running on the computer, and connected to the SmartMesh IP manager's serial port - a Node-RED instance running on the computer, publishing temperature data to your ThingWorx instance
| Note |
|---|
To replicate this blog postrecipe, you need a DC9000 SmartMesh IP starter kit, and a ThingWorx account (which is free for a 30-day trial). |
Tutorial
Start your ThingWorx instance
- create an account at https://developer.thingworx.com/signup
- log in
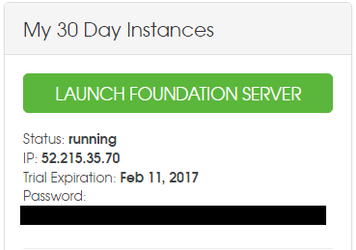
- start a foundation server
- launch a foundation server
| Tip | ||
|---|---|---|
| ||
At this point, there is an instance of ThingWorx running just for you in the cloud. We are only interested in the foundation server for this postrecipe. From your ThingWorx dashboard, you can "launch" it, i.e. open its web interface. Note that your instance has its own IP address, in my case
|
Configure your ThingWorx instance
Create an application key called "motekey" which you associate with user name "Administrator".

Once you save, the actual key is in field "keyId". In my case a807cb5d-6425-4786-95df-e09e2171a85d.
| Tip | ||
|---|---|---|
| ||
Your Thingworx instance is now configured so you can issue RESTful commands, and authenticate as Administrator using an application key. Yes, that's it! Pretty simple, right? |
Prepare your SmartMesh IP network
Switch on your SmartMesh IP manager and motes
Note We assume all SmartMesh IP motes are running the default firmware in master mode, and publish temperature data every 30 seconds.
Start the SmartMesh IP
JsonServerapplication and Node-RED, and connect theJsonServerapplication to your SmartMesh IP manager's serial API port.Tip See the SmartMesh IP and Node-RED, revisited recipe to see how to do that.
| Tip | ||
|---|---|---|
| ||
Your SmartMesh IP network is running, and the All you have to do now is have Node-RED publish those sensors' measurements to your ThingWorx instance! |
Publish Temperature to ThingWorx
Almost there, this is the last step!
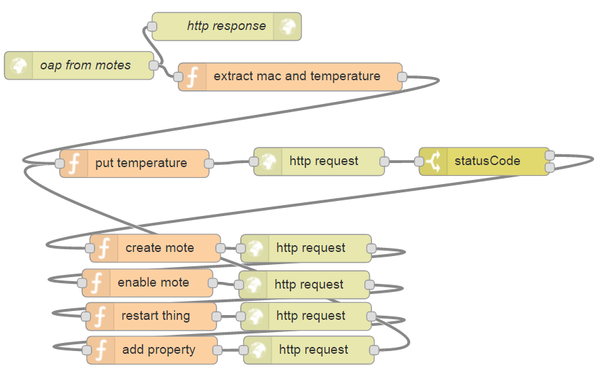
All we need to do is create a Node-RED flow which:
- listens for an HTTP POST request to URL
/oapto receive the OAP notifications form theJsonServer - filters temperature notifications, and extracts:
- the MAC address of the mote publishing
- the temperature
- try to publish the temperature value, as if a Thing already exists on ThingWorx for that mote
- if we receive HTTP status code 404, it indicates that mote hasn't been registered yet on Thingworx; in this case, do the following:
- issue an HTTP request to ThingWorx to create a Thing corresponding to this MAC address
- issue an HTTP request to ThingWorx to enable that Thing
- issue an HTTP request to ThingWorx to restart that Thing
- issue an HTTP request to ThingWorx to add property "temperature" to that Thing
- try to publish temperature again
This is what the resulting Node-RED flow looks like:
| Info | ||||||||||
|---|---|---|---|---|---|---|---|---|---|---|
| ||||||||||
|
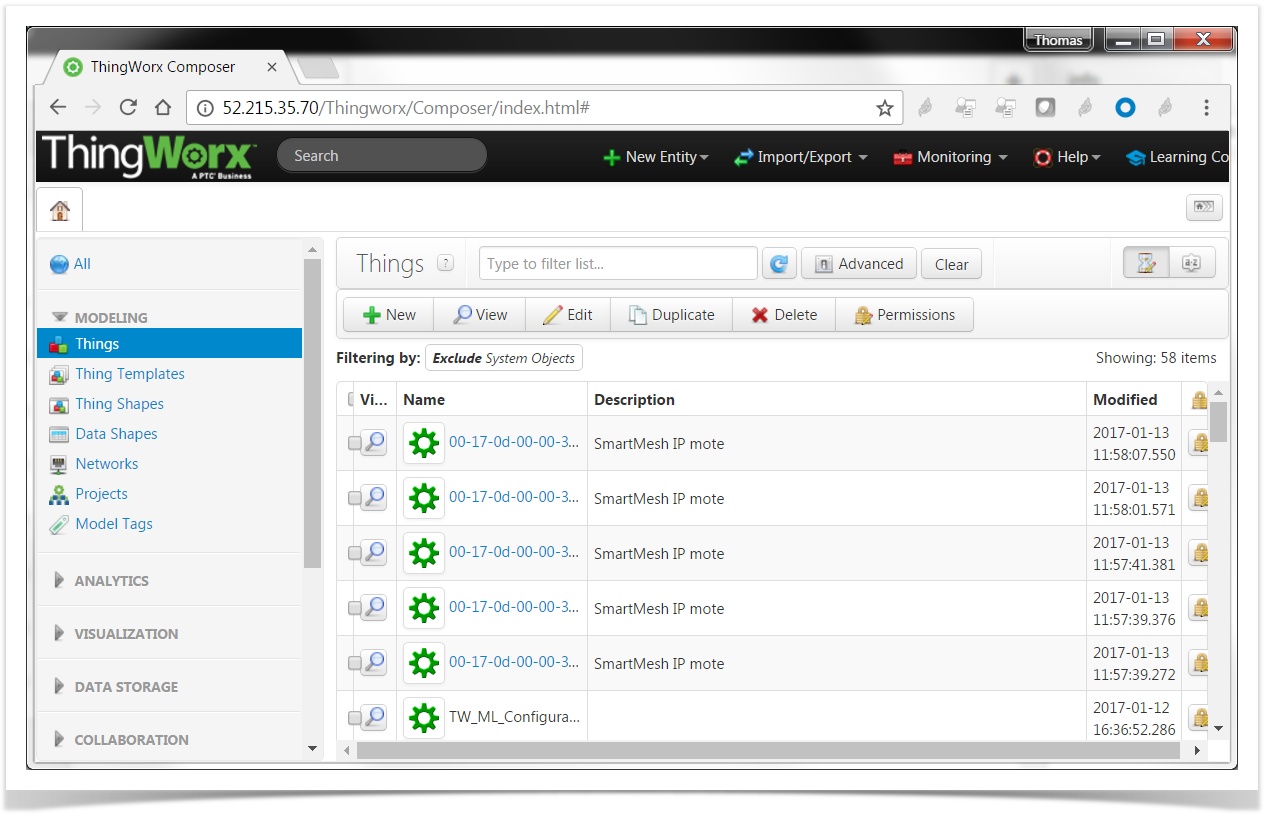
Once everything is running, in your ThingWorx console, you can see the Things corresponding to your motes (we use the mote's MAC address at the name of the thing):
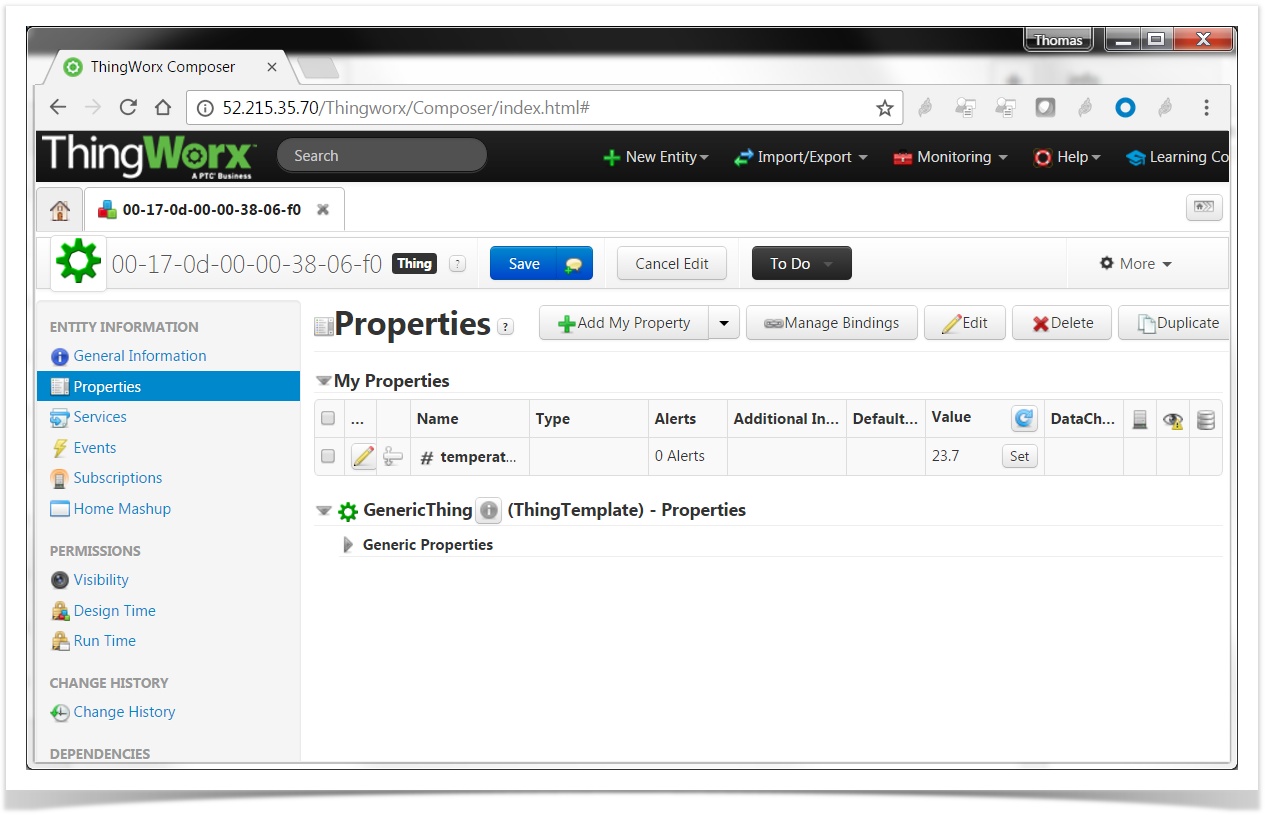
If you click on a mote, and list its properties, you will see there is a property called "temperature" with the latest published value:
Discussion
This post recipe doesn't even scratch the surface of what ThingWorx can do.
Things you can build now:
- create a "Mashup", i.e. a webpage which can serve as a dashboard to see the state and data of your Things
- add interactions between Things
- start an analytics server to analyze your data
- etc.
| Warning | ||
|---|---|---|
| ||
Security MUST be taken seriously in all applications, including end-to-end IoT solutions like the one we are building here. This post recipe is minimal by design, and doesn't detail nor contain the level of security you need for a production system. Thing we haven't touched upon:
When building a production system, we strongly recommend implementing industry-standard security methods. |
Some links for your further exploration.
- the ThingWorx REST API:
- the ThingWorx Analytics platform: