| Info | ||
|---|---|---|
|

| Tip |
|---|
This recipe updates the previously published "SmartMesh IP and Node-RED" recipe. In this recipe, we use the |
| Table of Contents |
|---|
Overview of Node-RED
Node-RED is a fun tool from IBM Research to "wire up the IoT". It's a program you launch on your computer, which allowing you to link inputs (sensors, etc.) to outputs (actuators, files, Twitter feeds, etc.) through a web-based graphical interface.
| Widget Connector | ||||||
|---|---|---|---|---|---|---|
|
SmartMesh IP and Node-RED are a perfect match. I'll show you a couple of examples in this recipe. You will be using the brand new JsonServer application from the SmartMesh SDK; you won't even have to write a line of code!
| Info | ||
|---|---|---|
| ||
To complete this tutorial, you need to have:
We assume the motes are running the default firmware, in master mode. We assume that the manager is connected to your computer over USB, that all the motes are switched on, and that all motes have joined the network. We assume you have downloaded the SmartMesh SDK, and are comfortable enough with it that you can launch different applications. |
Setup
Installing Node-RED
The first step is to install Node-RED.
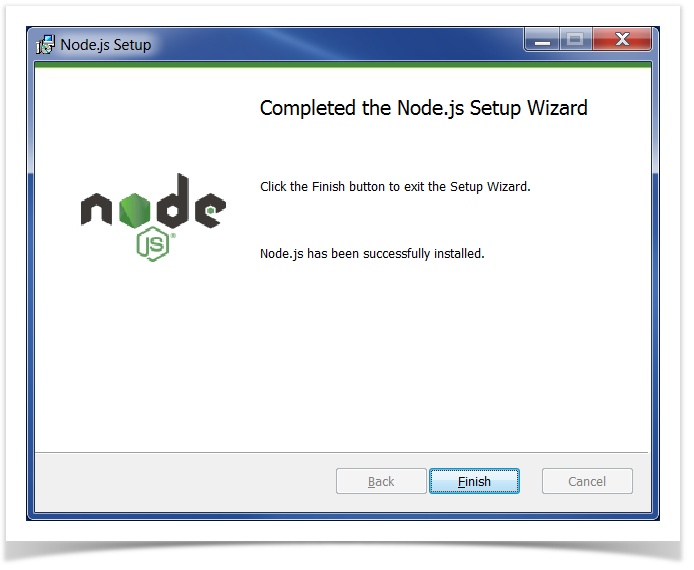
- First, install Node.js. There a number of options. On my Windows machine, it just means downloading an installer and clicking through the default installation options.
npm is the "node package manager", part of Node.js)| Code Block |
|---|
C:\Users\twatteyne>npm --version
2.15.9 |
- You install Node-RED through
npm:
| Code Block |
|---|
npm install -g --unsafe-perm node-red |
- Finally, you can start Node-RED:
| Code Block |
|---|
C:\Users\twatteyne>node-red

Welcome to Node-RED
===================

1 Sep 15:02:04 - [info] Node-RED version: v0.14.6
1 Sep 15:02:04 - [info] Node.js  version: v4.5.0
1 Sep 15:02:04 - [info] Windows_NT 6.1.7601 x64 LE
1 Sep 15:02:04 - [info] Loading palette nodes
1 Sep 15:02:05 - [warn] ------------------------------------------------------
1 Sep 15:02:05 - [warn] [rpi-gpio] Info : Ignoring Raspberry Pi specific node
1 Sep 15:02:05 - [warn] [tail] Not currently supported on Windows.
1 Sep 15:02:05 - [warn] ------------------------------------------------------
1 Sep 15:02:05 - [info] Settings file  : C:\Users\twatteyne\AppData\Roaming\npm\
node_modules\node-red\settings.js
1 Sep 15:02:05 - [info] User directory : \Users\twatteyne\.node-red
1 Sep 15:02:05 - [info] Flows file     : \Users\twatteyne\.node-red\flows_HDC_SW
01.json
1 Sep 15:02:05 - [info] Creating new flow file
1 Sep 15:02:05 - [info] Starting flows
1 Sep 15:02:05 - [info] Started flows
1 Sep 15:02:05 - [info] Server now running at http://127.0.0.1:1880/ |
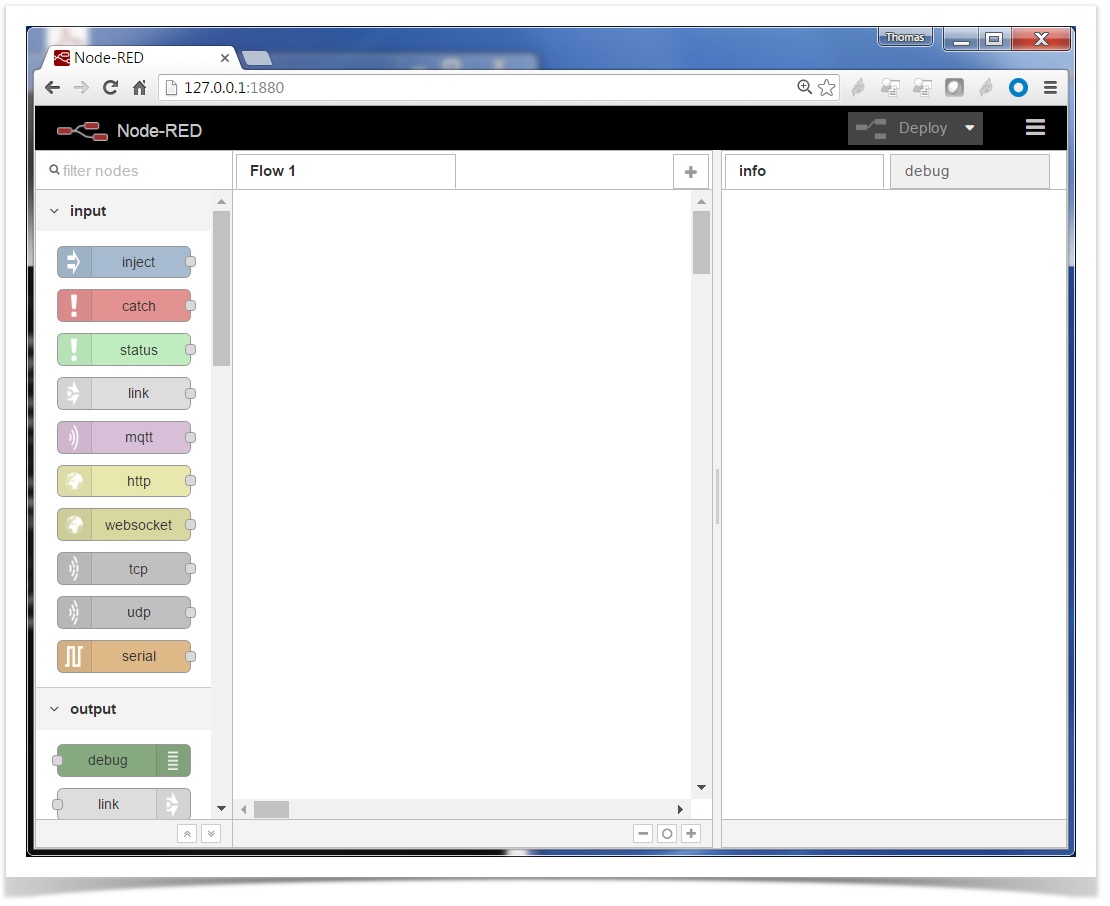
Point your browser to http://localhost:1880/ to see the Node-RED web interface:
Info title Geeky details As you can see from the URL above, the Node-RED application starts a web server which listens on port 1880.
| Include Page | ||||
|---|---|---|---|---|
|
Running the JsonServer application
This application is part of the SMSDK. To start it, double-click on JsonServer.py.
Starting your network
We assume that you have a SmartMesh IP manager connected to the computer which runs the JsonServer application, and a couple of motes already in the network.
Interact with your SmartMesh IP nodes using Node-RED!
In this section, we will create a number of Node-RED flows to interact with your SmartMesh IP network directly from Node-RED!
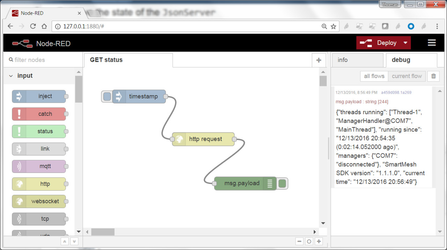
Retrieve the status of the JsonServer
Use Node-RED to issue the following HTTP request:
| method | GET |
|---|---|
| URI | http://127.0.0.1:8080/api/v1/status |
| body | none |
To do so, in Node-RED, create a flow called "status" with the following contents:
| Info | ||||||||
|---|---|---|---|---|---|---|---|---|
| ||||||||
|
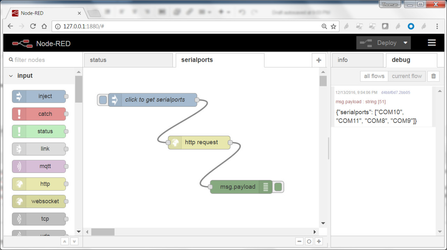
List the available serial ports
Use Node-RED to issue the following HTTP request:
| method | GET |
|---|---|
| URI | http://127.0.0.1:8080/api/v1/helpers/serialports |
| body | none |
To do so, in Node-RED, create a flow called "serialports" with the following contents:
| Info | ||||||||
|---|---|---|---|---|---|---|---|---|
| ||||||||
|
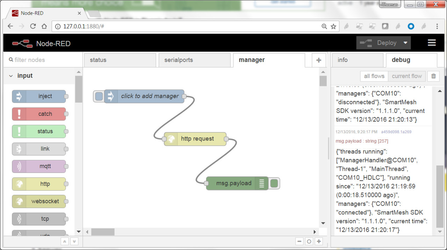
Connect to your SmartMesh IP Manager
Use Node-RED to issue the following HTTP request:
| method | PUT | ||
|---|---|---|---|
| URI | http://127.0.0.1:8080/api/v1/config/managers | ||
| body |
|
To do so, in Node-RED, create a flow called "managers" with the following contents:
| Info | ||||||||
|---|---|---|---|---|---|---|---|---|
| ||||||||
|
List operational motes
Use Node-RED to issue the following HTTP request:
| method | GET |
|---|---|
| URI | http://127.0.0.1:8080/api/v1/helpers/motes |
| body | none |
To do so, in Node-RED, create a flow called "motes" with the following contents:

| Info | ||||||||
|---|---|---|---|---|---|---|---|---|
| ||||||||
|
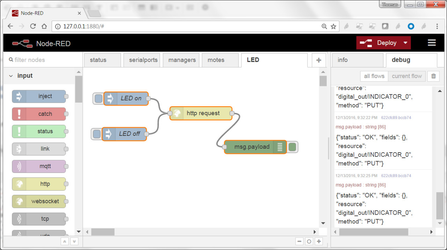
Blink LEDs on motes
Use Node-RED to issue the following HTTP request:
| method | PUT | ||
|---|---|---|---|
| URI | http://127.0.0.1:8080/api/v1/oap/00-17-0d-00-00-38-06-45/digital_out/INDICATOR_0 | ||
| body |
|
To do so, in Node-RED, create a flow called "LED" with the following contents:
| Info | ||||||||
|---|---|---|---|---|---|---|---|---|
| ||||||||
|
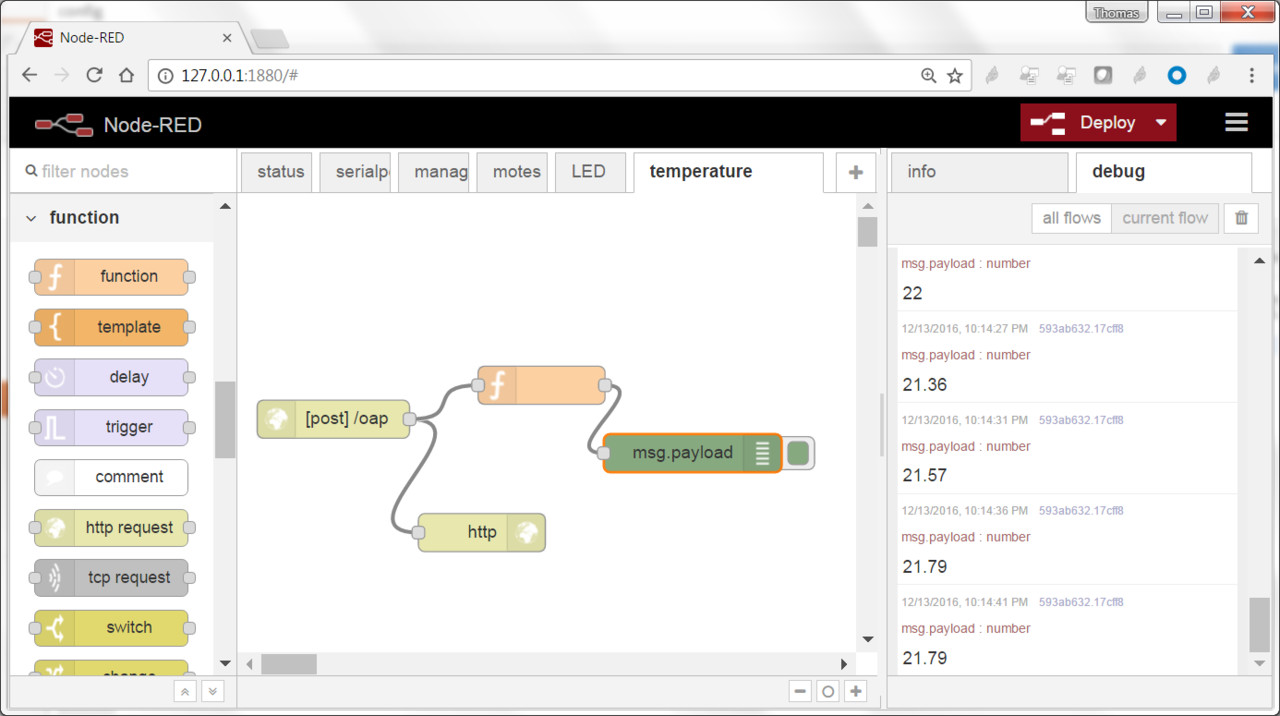
Display temperature readings
Use Node-RED to receive the following HTTP requests:
| method | POST |
|---|---|
| URI | /oap |
| Info | ||
|---|---|---|
| ||
The JsonServer application continuously receives notifications from the SmartMesh IP manager over its serial port. This includes data notifications. Its default behavior is to issue an HTTP POST request to url Port 1880 is precisely the port Node-RED runs on by default. This means that, by simply listening for HTTP requests on URI |
Add a function so the debug console prints only the temperature values received, in C.
| Info | ||||||||
|---|---|---|---|---|---|---|---|---|
| ||||||||
|
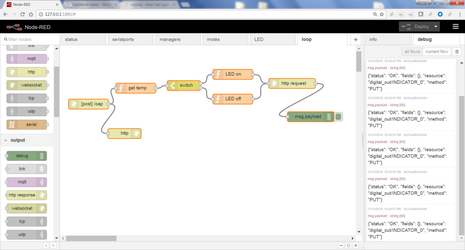
A little control loop!
You can install the following very simple control loop: set the LED of one mote if the temperature measured by the other mote is larger than 20C
| Info | ||||||||
|---|---|---|---|---|---|---|---|---|
| ||||||||
|
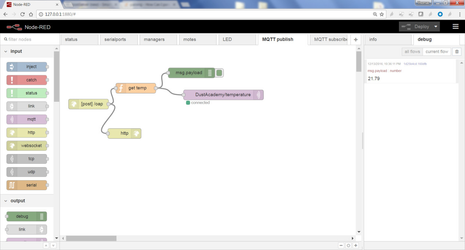
MQTT integration!
MQTT allows you to coordinate two independent flows, possibly running on different computers.
For that, create two flows:
The first flow publishes the temperature to the HiveMQ MQTT broker on topic DustAcademy/temperature:
| Info | ||||||||
|---|---|---|---|---|---|---|---|---|
| ||||||||
|
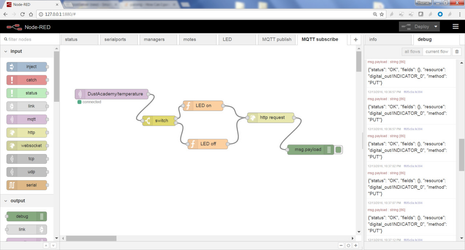
The second flow subscribes to this broker and topic, and switches the LED on/off depending on the temperature value:
| Info | ||||||||
|---|---|---|---|---|---|---|---|---|
| ||||||||
|