| Info | ||
|---|---|---|
| ||
|
| Table of Contents |
|---|
| Tip | ||
|---|---|---|
| ||
This post recipe focuses on the integration of SmartMesh IP into HiveMQ. If you don't know what HiveMQ and/or MQTT is, we recommend the excellent getting started guides from HiveMQ. |
The goal of this blogpost is recipe is to get you started integrating your SmartMesh IP network into HiveMQ. After following these steps, you will be able to explore all the possibilities HiveMQ offers.
Overview

MQTT is a system which allows computers to publish messages to a broker. Each message is attached a topic (e.g. "dustcloud/temperature"). MQTT also allows computers to subsribe to certain topics. MQTT is scalable (i.e. many computers can be publishing/subscribing to many messages at the same time) and has several security options.
![]()
HiveMQ is a company which sells an MQTT broker with all the features (security, scalability, support...) appropriate for Enterprise solutions.
In this postrecipe, we show you atomic integration examples between your SmartMesh IP network and MQTT, enough to get you started on more complete integration for your application.
Tutorials
Publish Temperature to HiveMQ
We start with the most straightforward use case of HiveMQ: (sensor) data publishing.
Here is what the system you will build does:
- a SmartMesh IP mote generates some (sensor) data
- the mote sends it, through the SmartMesh IP mesh network, to the manager
- the manager publishes the data through its serial port, as a data notification
- this data notification is received by the JsonServer application (part of the SmartMesh SDK)
- JsonServer sends it to a local instance of Node-RED
- Node-RED publishes it to a HiveMQ broker, on topic "dustcloud/temperature"
- anybody in the world who is connected to the same broker - and subscribed to that topic - gets a notification
In a nutshell, add publish/subscribe capabilities to your SmartMesh IP network in a couple of clicks!
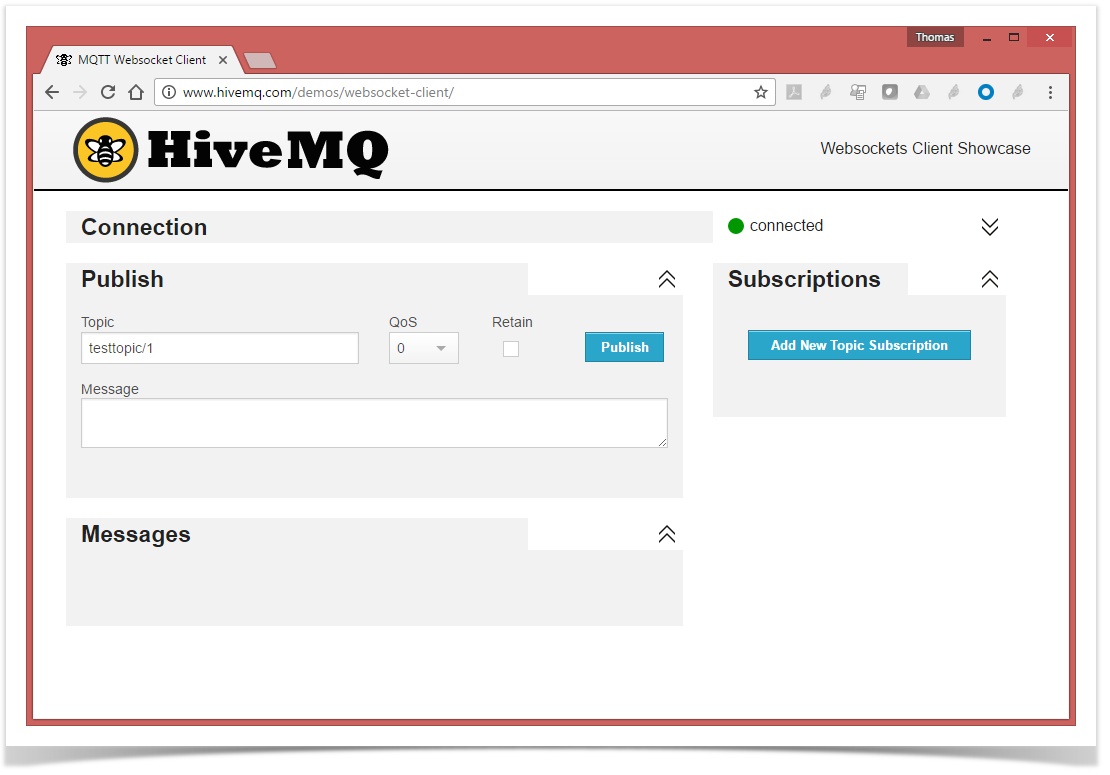
Connect to the HiveMQ WebSocket Client
- Point your browser to http://www.hivemq.com/demos/websocket-client/
- Leave all the fields untouched, and click "Connect"
| Tip | ||
|---|---|---|
| ||
Your browser is now connected to HiveMQ's demo MQTT broker. Easy, right? |
| Note | ||
|---|---|---|
| ||
It is possible that you get the following message after clicking the "Connect" button. This is because your firewall prevents you from communicating with the HiveMQ demo MQTT broker over port 8000. Contact you network or system administrator.
|

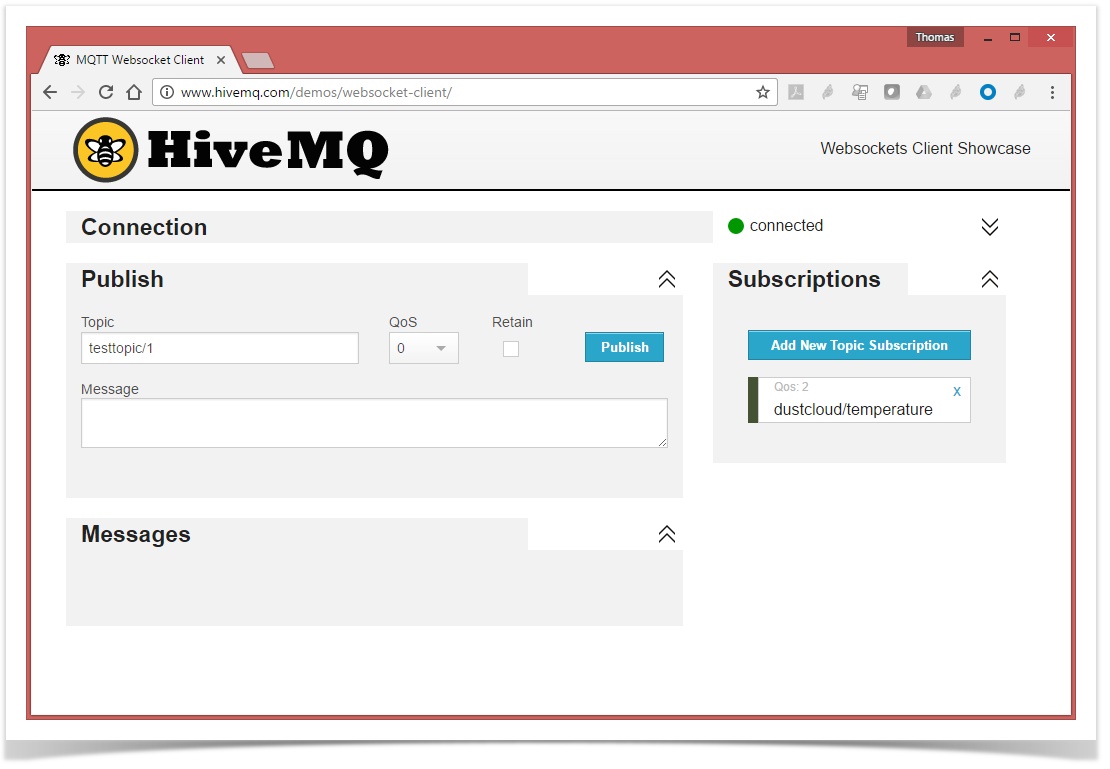
Subscribe to the dustcloud Topic
On the right-hand side, add a new subscription to the "dustcloud/temperature" topic.
| Tip | ||
|---|---|---|
| ||
You will get a notification anytime someone connected to the same MQTT broker sends a message to this topic. That's exactly what we will do below. |
Prepare your SmartMesh IP network
Switch on your SmartMesh IP manager and motes
Note We assume all SmartMesh IP motes are running the default firmware in master mode, and publish temperature data every 30 seconds.
Start the SmartMesh IP JsonServer application and Node-RED, and connect the JsonServer application to your SmartMesh IP manager's serial API port.
Tip See the SmartMesh IP and Node-RED, revisited recipe to see how to do that.
| Tip | ||
|---|---|---|
| ||
Your SmartMesh IP network is running, and the All you have to do now is have Node-RED publish those sensor measurements to your HiveMQ demo MQTT broker! |
Publish Temperature to HiveMQ
Almost there, this is the last step!
All we need to do is create a Node-RED flow which:
- listens for an HTTP POST request to URL
/oapto receive the OAP notifications form theJsonServer - filters temperature notifications, and extracts:
- the MAC address of the mote publishing
- the temperature
- publishes that information to the HiveMQ demo MQTT broker
This is what the resulting Node-RED flow looks like:

| Info | ||||||||
|---|---|---|---|---|---|---|---|---|
| ||||||||
|
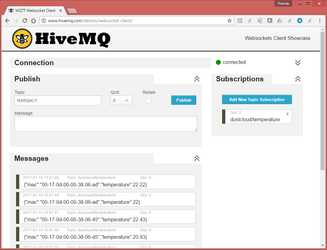
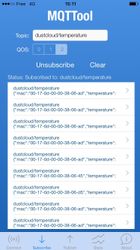
You can now see the notifications on any MQTT client in the world which is connected to this broker and subscribed to the "dustcloud" topic:
|
|
| using HiveMQ's websocket's client | using a smart phone app (here MQTTool for iOS) |
|---|
| Tip | ||
|---|---|---|
| ||
That's it! You are now pushing data into one the most convenient and efficient publish/subscribe systems! Enjoy! (but keep reading to see another use case and some important discussion) |
Actuate LEDs from the Cloud
Your SmartMesh IP mote can interface to virtually any sensor and actuator through analog and digital interfaces. The default firmware which is pre-loaded allows you to emulate this by doing the simplest remote actuation: setting an LED.
The TempMonitor sample application (part of the SmartMesh SDK) allows you to actuate a mote's LED from the manager. In this section, we take it one step further, and allow your to actuate and LED from the cloud!
Setup
We use the exact same setup as before, all we will do is change the Node-RED flow.
Subscribe to the "dustcloud/led" topic on HiveMQ
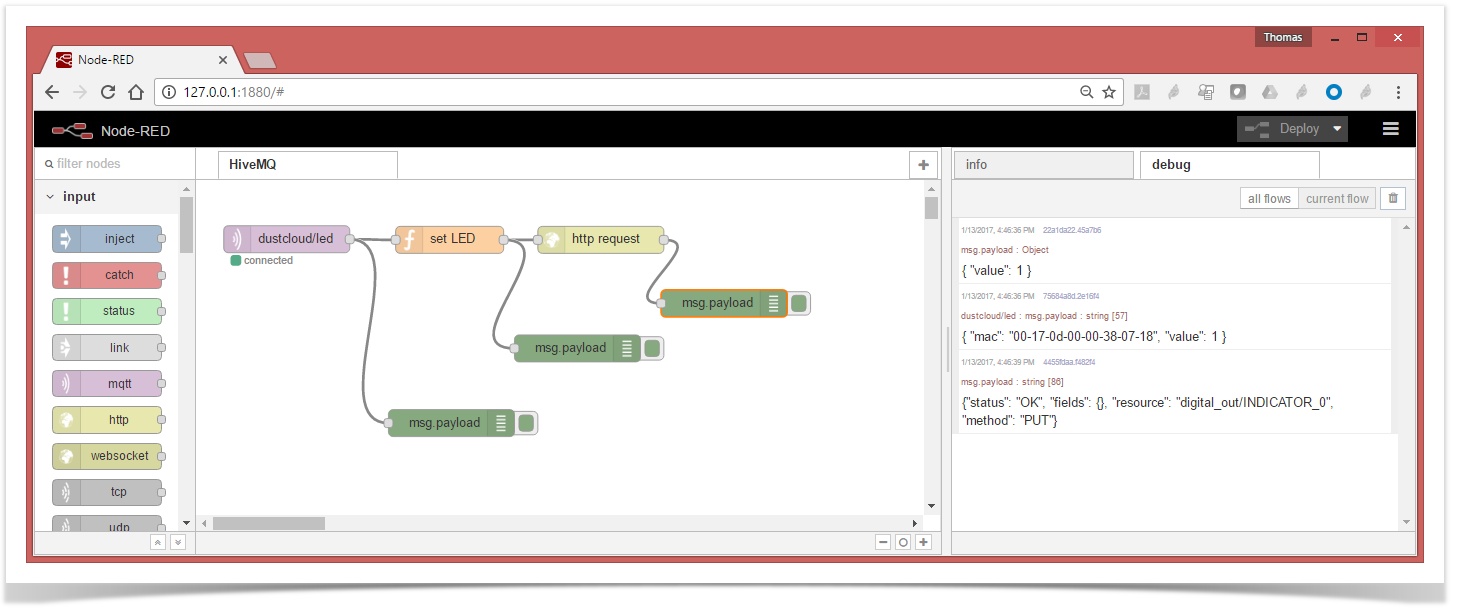
All we need to do is create a Node-RED flow which:
- connects to the HiveMQ demo MQTT broker and subscribes to the "dustcloud/led" topic
- when receiving a notification, issues the appropriate HTTP request to the JsonServer
This is what the resulting Node-RED flow looks like:
| Info | ||||||||
|---|---|---|---|---|---|---|---|---|
| ||||||||
|
Actuate your mote's LED from anywhere in the world!
On your HiveMQ websocket client, publish the following message to the "dustcloud/led" topic
| Code Block |
|---|
{
    "mac":   "00-17-0d-00-00-38-07-18",
    "value": 1
} |
Set value to "1" to switch the LED on, set to "0" to switch it off.
| Note |
|---|
Of course, replace the MAC address ( |
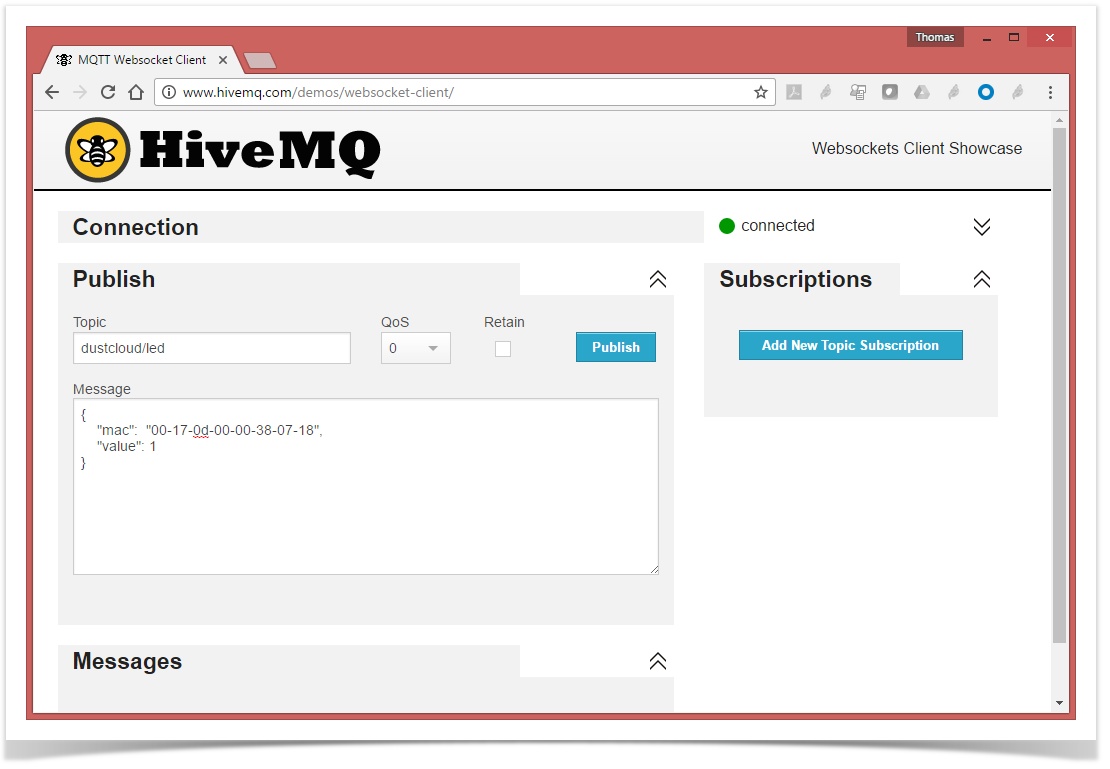
Tada, the LED changes state!
| Tip |
|---|
Any MQTT client connected to that broker can issue the same message. This means your can trigger actuation from anywhere in the world, using any type of device, including your smart phone. |
Discussion
This post doesnrecipe doesn't even scratch the surface of what HiveMQ and MQTT allow you to do.
Things you can build now:
- create a "control loop", where the data sent by one mote triggers an actuation on a different mote
- connect multiple SmartMesh IP networks logically together by having them publish/subscribe to the same HiveMQ broker
- use HiveMQ's websocket feature to include notifications directly into your web pages
- plug in analytics, databases, visualization tools, etc. to the MQTT broker to build a complete solution
- etc.
| Warning | ||
|---|---|---|
| ||
Security MUST be taken seriously in all applications, including end-to-end IoT solutions like the one we are building here. This post recipe is minimal by design, and doesn't detail nor contain the level of security you need for a production system. Things we haven't touched upon:
When building a production system, we strongly recommend implementing industry-standard security methods. |
Some links for your further exploration.
- MQTT: http://mqtt.org/
- Details about the performance HiveMQ's solution: http://www.hivemq.com/benchmarks
- HiveMQ's clustering solution: http://www.hivemq.com/clustering-hivemq-paper/
- Integrate HiveMQ datastreams into your webpage using websockets: http://www.hivemq.com/docs/hivemq/latest/#websockets-chapter
- HiveMQ plugins: http://www.hivemq.com/extensions/plugins/